If you’re trying to improve your home’s energy efficiency, you’ve probably heard about loft insulation. But there’s one area many people forget — the loft hatch.
Even if your loft is well insulated, an unsealed or poorly insulated hatch can leak warm air and let in cold draughts, costing you money every time the heating is on.
In this guide, we’ll walk you through the cheapest way to insulate your loft hatch, why it matters, and how to do it with simple tools — no tradesperson needed.
🔥 Why You Need to Insulate Your Loft Hatch
🚪 A Hidden Heat Leak
Most UK homes lose heat through the roof. That’s why insulation is added to the loft floor — but many people overlook the hatch itself.
Think of your loft hatch like a hole in your ceiling. If it’s not sealed and insulated, warm air rises straight into the cold loft. That’s wasted money and energy.
🧊 Common Problems with Loft Hatches
- Thin plywood hatch with no insulation
- Gaps around the edges causing draughts
- No vapour barrier or air seal
- Hatch door sits loosely or warps over time
💸 Budget Materials: What You’ll Need (Under £15)
Here’s the cheapest DIY way to insulate a loft hatch — all with materials from your local hardware shop or online:
| Item | Use | Approx. Cost |
|---|---|---|
| ✅ Foam insulation board | Insulate the hatch lid (25–50mm) | £5–£8 |
| ✅ Double-sided tape / adhesive | Stick insulation board securely | £2–£3 |
| ✅ Draught-proofing tape | Seal gaps around hatch frame | £2–£3 |
| ✂️ Utility knife / scissors | Trim insulation to size | Free (assumed) |
| 📏 Measuring tape | Ensure accurate fit | Free |
Optional:
– Reflective foil backing (adds heat reflection)
– Wood battens (if your hatch needs thickening)

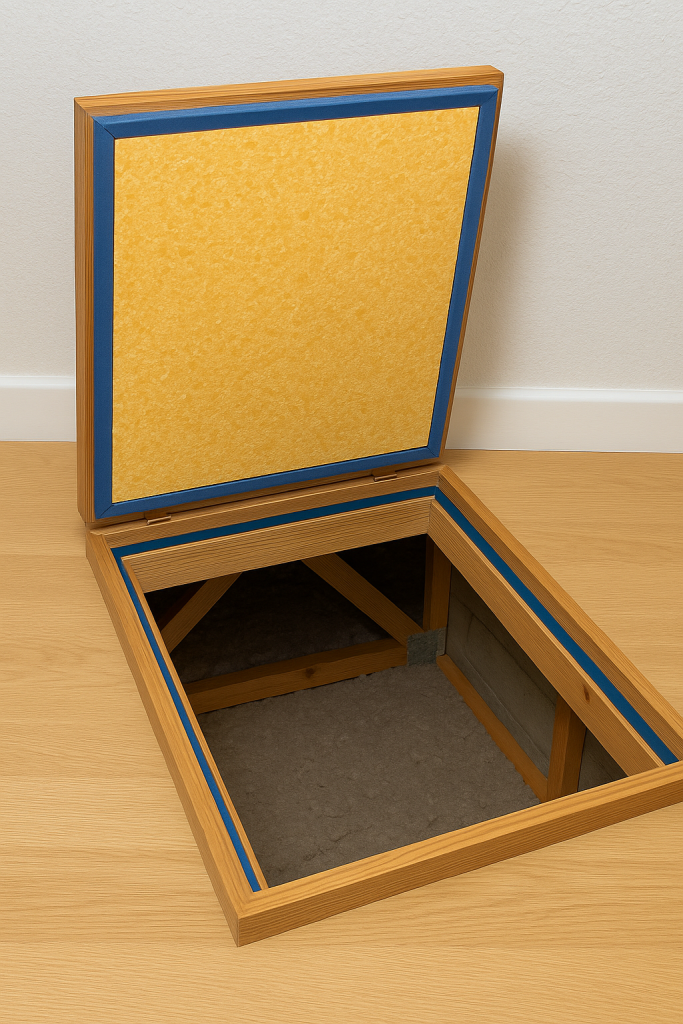
Image: Foam board insulation cut to fit loft hatch.
🛠️ Step-by-Step Guide: Insulate Your Loft Hatch the Cheap Way
✅ Step 1: Measure the Hatch
Use a measuring tape to get:
- The internal dimensions of the hatch lid
- The width of the hatch frame for sealing
This ensures your insulation board fits snugly and doesn’t block the hatch from closing.
✅ Step 2: Cut the Foam Insulation Board
Use a utility knife to cut rigid foam board to match your hatch door size. 25–50mm thick board works best. Keep it flush to avoid jamming.
💡 Tip: You can layer two thinner sheets if that’s easier or cheaper.
✅ Step 3: Stick the Board to the Hatch Door
Use strong double-sided tape or grab adhesive to secure the board to the inside face of the hatch lid.
Press firmly around all edges to make sure it’s fully stuck and won’t sag.
✅ Step 4: Seal the Frame with Draught Tape
Apply self-adhesive foam or rubber tape along the frame where the hatch door rests.
This stops warm air from leaking out the sides and keeps cold draughts from sneaking in.
Make sure the hatch can still close firmly without too much resistance.
✅ Step 5: Test the Fit
Close the hatch and:
- Check if it seals all around
- Feel for any draughts
- Ensure it doesn’t rattle or sit unevenly
🪄 Optional: Boost Performance with These Quick Extras
🔄 Add Reflective Foil
Stick radiator foil or similar reflective material to the board’s surface. It reflects radiant heat back into your home.
Cost: ~£3
Time: 5 minutes
📦 Build a Simple Insulation Box
If your hatch uses a ladder or drops down, make a simple foam box or hood just above the hatch inside the loft.
This traps a layer of still air and blocks cold air from falling into the room when the hatch opens.
🧠 What Most People Get Wrong
| Mistake | Why It Hurts Efficiency |
|---|---|
| Skipping the draught seal | Gaps leak more heat than the hatch itself |
| Using cheap bubble wrap | Looks insulated, but performs poorly |
| Insulation too thick to close | The hatch won’t seal = wasted effort |
| No testing after install | You’ll miss small leaks |
📉 How Much Can You Save?
While insulating your loft hatch alone won’t slash hundreds from your bill, it completes the insulation picture. Combined with proper loft and wall insulation, it helps you maintain warmth longer — and use your heating less.
Estimated savings:
💰 £20–£50 per year in a typical semi-detached home.
Cost to insulate:
🛠️ Under £10 with basic materials.
Break-even:
📅 1 winter season or less.
🤔 FAQs About Loft Hatch Insulation
Do I need a special hatch door?
No. Most standard loft hatches can be insulated with foam board and draught tape.
What if I have a drop-down ladder?
You can still insulate the door and build a simple box or hood in the loft for extra coverage.
Can I use old bubble wrap or cardboard?
It won’t perform nearly as well as rigid foam and can trap moisture. Stick with closed-cell insulation for best results.
Will it stop dust coming through?
Yes — sealing the hatch frame also keeps out loft dust, cold air, and insulation fibres.
🏁 Final Thoughts
Insulating your loft hatch is one of the cheapest and most effective DIY energy-saving jobs you can do in just 30–60 minutes. With a few materials and basic tools, you can block out heat loss, reduce draughts, and start saving money straight away.
Don’t let your loft hatch be the weak spot in your home’s thermal barrier — seal it up, insulate it, and feel the difference next time your heating comes on.